Configure Remote Logging For Office 365
For everything that is amazing about Microsoft Azure, remote logging is one of those things that seems to be more complicated than necessary. The only
way to export logs remotely is via the Office 365 Activity API, which requires multiple steps to enable.
In this article we will go step by step explaining what you need to do to enable remote logging to allow you to read them via Trunc (or any other SIEM / Log analysis tool).
Step 1. Enable Logging for Office 365
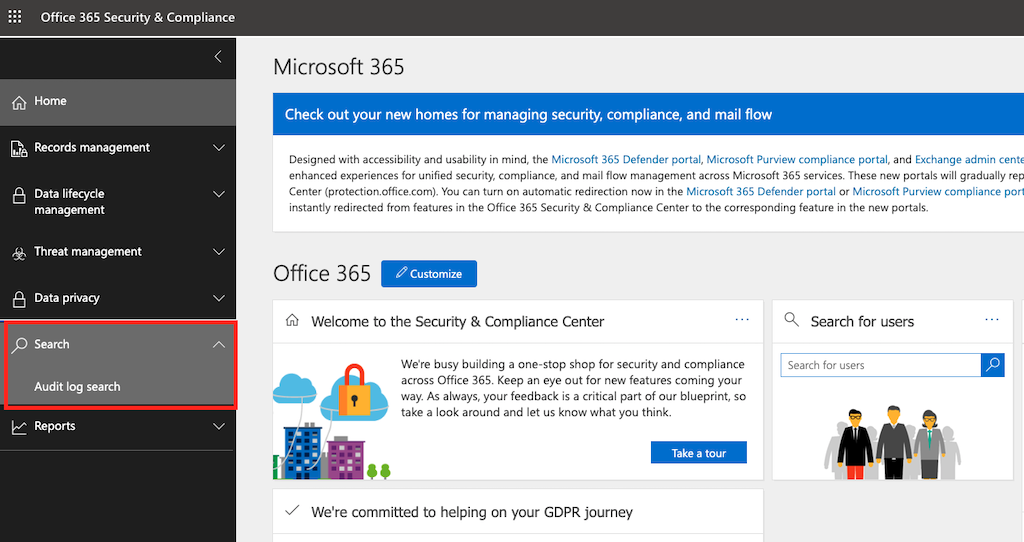
Logging is not enabled by default. Enable by going to https://protection.office.com.
From the left hand panel click on Search. This will expand the menu and click on Audit Log Search.
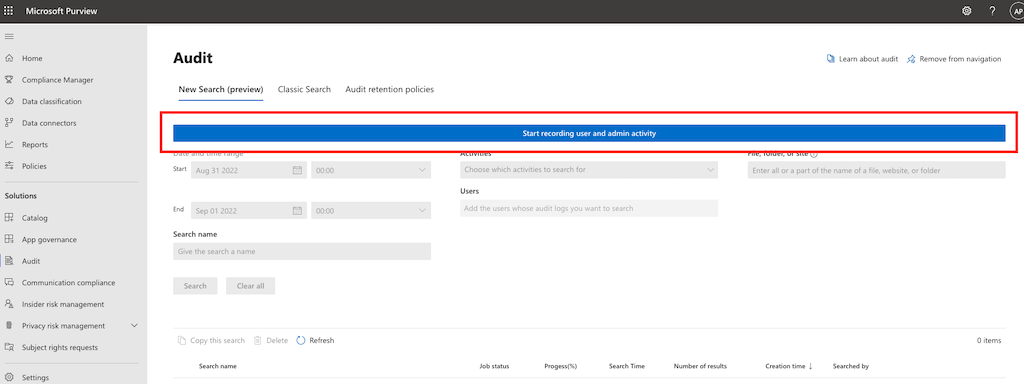
If logging is disabled you will see an option that reads Start recording user and admin activity:
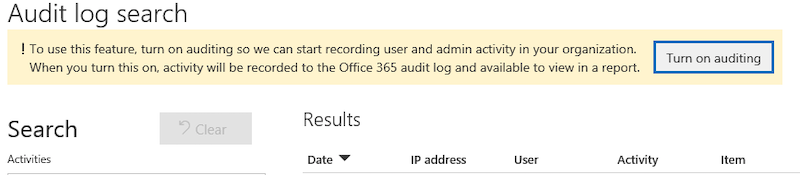
If you are not able to log into the protection domain it might have to do with your permissions. Coordinate with your administrator to update your role in Azure AD. Depending on your version, you might also see something like this:
For advanced users or IT support teams, the following PowerShell command can also be used:
Set-AdminAuditLogConfig -UnifiedAuditLogIngestionEnabled $true
Once enabled, audit logs will be available for all future activity, however user activity prior to activation is not included. For most users audit log data is retained for 90 days, but may be held for longer if your Microsoft 365 license includes additional data retention features.
Step 2. Register Trunc App with Azure
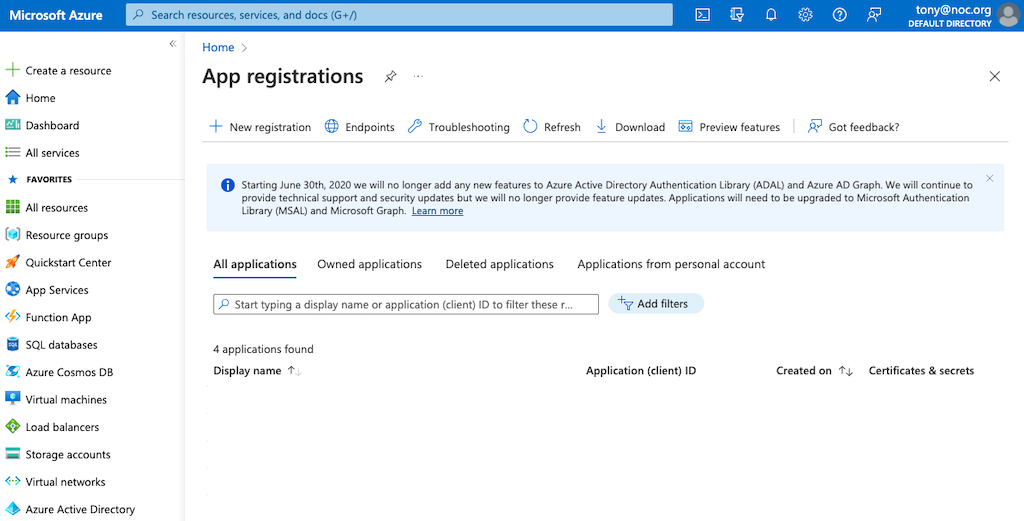
We make use of the Office 365 Management API to extract the logs. To make this work, we need you to create and register a new app inside your Azure environment. This will allow us to dynamically pull logs on your behalf and store them inside Trunc.
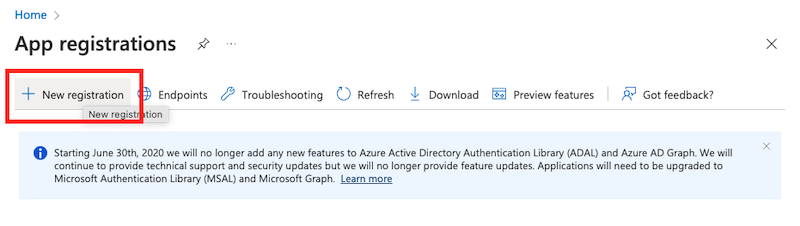
To achieve this, we need to authenticate with the Microsoft identity platform endpoint. Do this by opening the Microsoft Azure Portal App Registrations section in Azure. You will be greeted with a page like this:
Click on New Registration in the top navigation:
A new pane will open that reads Register an application.
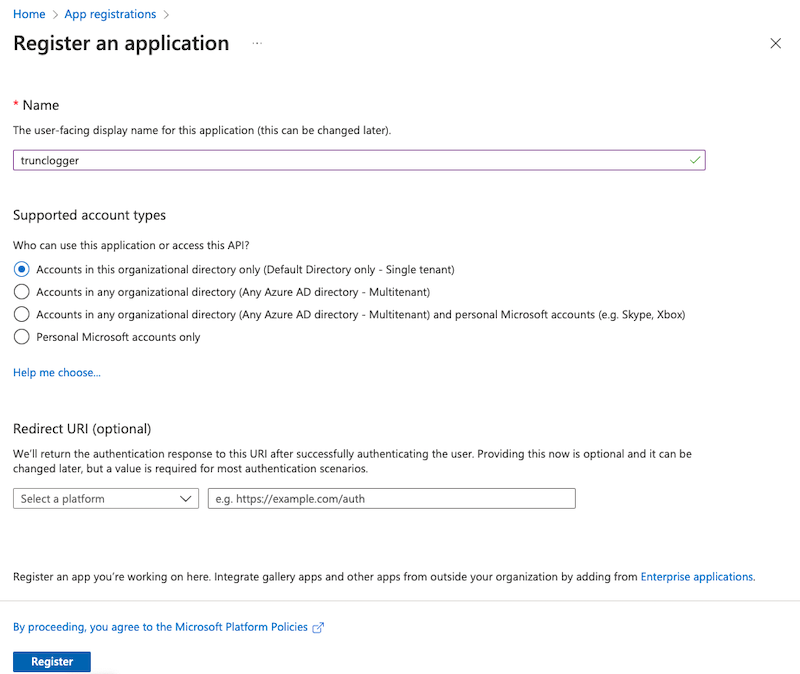
Give the application a name, and decide whether you want all your tenants to be accessible or a specific one. In this instance I keep it in the organizational directory only because we have one tenant. If you have multiple tenants you will want to account for that by allowing it to access them all.
You can leave th Redirect URI blank.
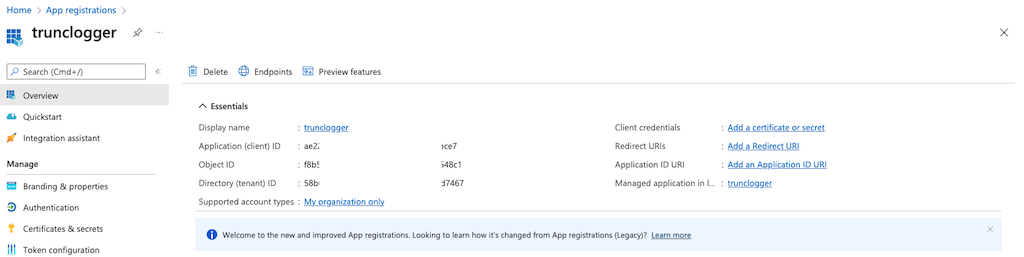
Some information will appear, this information is going to be critical to our access. Please be sure to save the Application (client) ID) and Directory (tenant) ID:
Step 3. Create Authentication Key
With the app created, now we have to create a new authentication key. This will be used by our system to authenticate with the system when we pull logs, something that has to be done to get authorization keys which in turn allow us to pull information from your account.
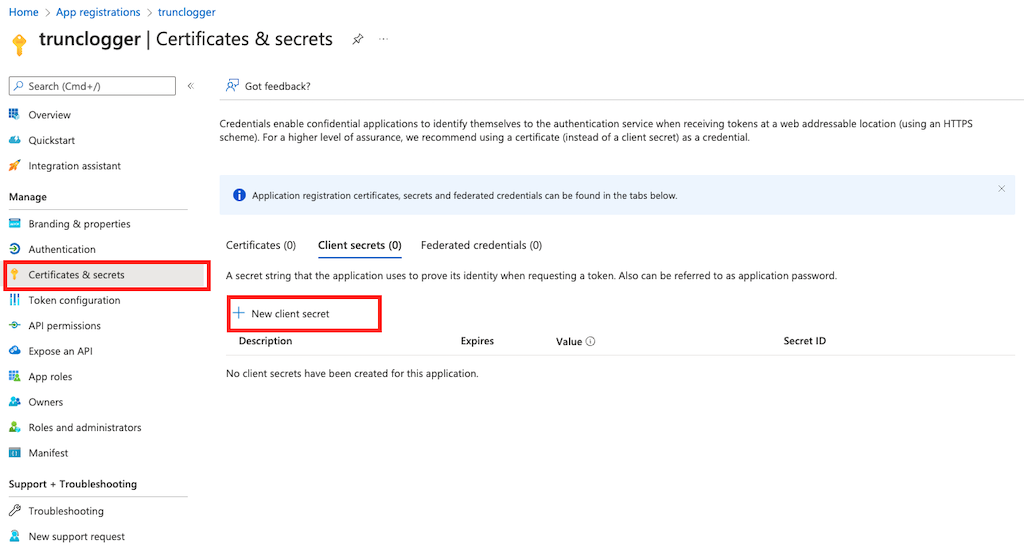
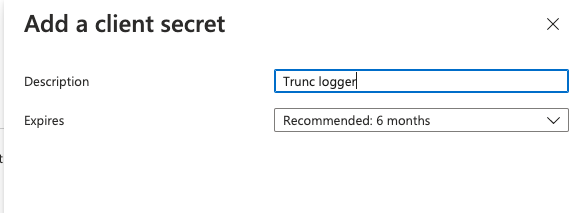
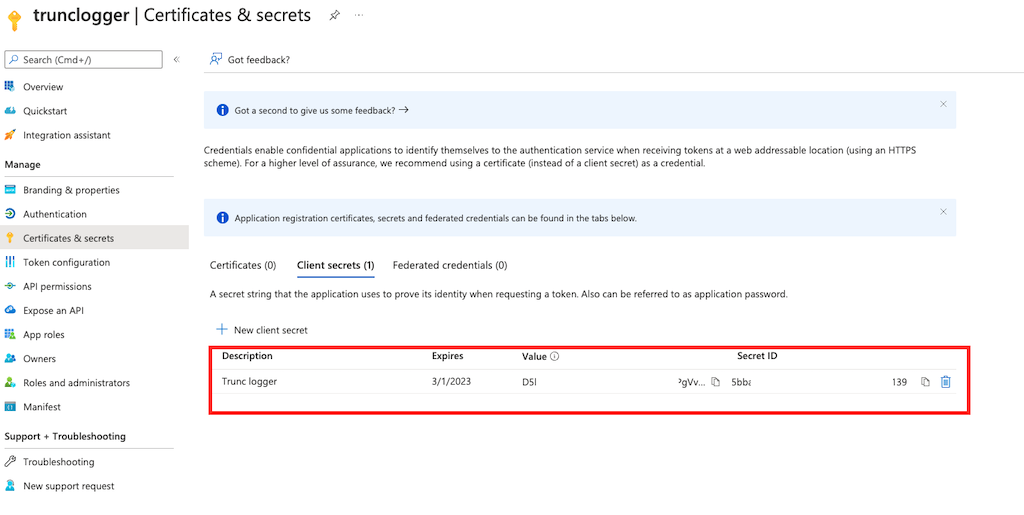
Navigate to Certificates & Secrets and click on New client secret:
This will open a new modal that will allow you to give the secret a description and set a duration. Be mindful of the frequency you set, that will require us to update our key accordingly. We recommend choosing the lonest duration possible.
This will add the key to the list after adding it. Save the value string, we will need that.
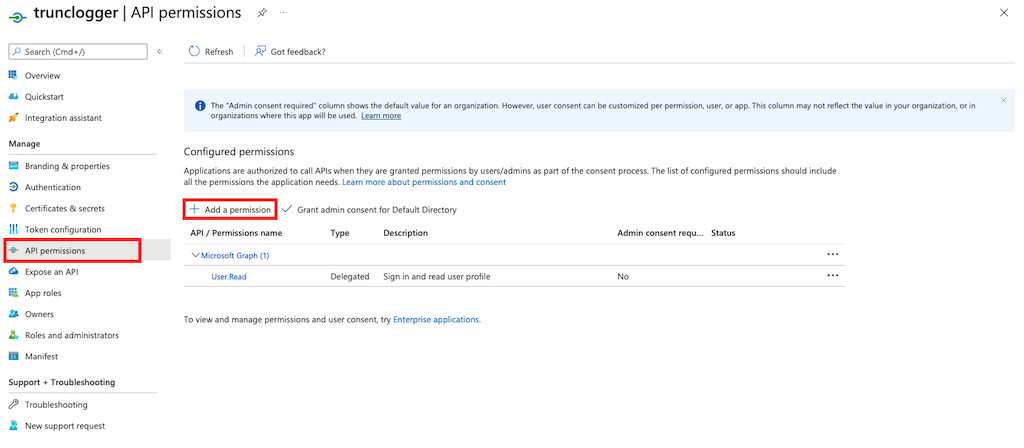
Step 4. Add Permissions to the App
Now we have to give the application specific API permissions to be able to request the Office 365 activity events. For O365 you want permissions related to https://manage.office.com.
Click on API Permissions and click Add a permission:
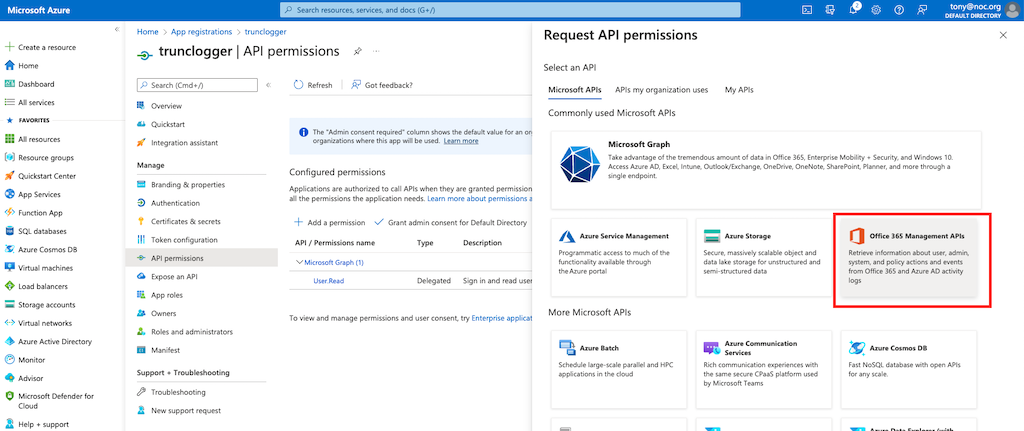
Select the Office 365 Management APIs from the dialog that pops up:
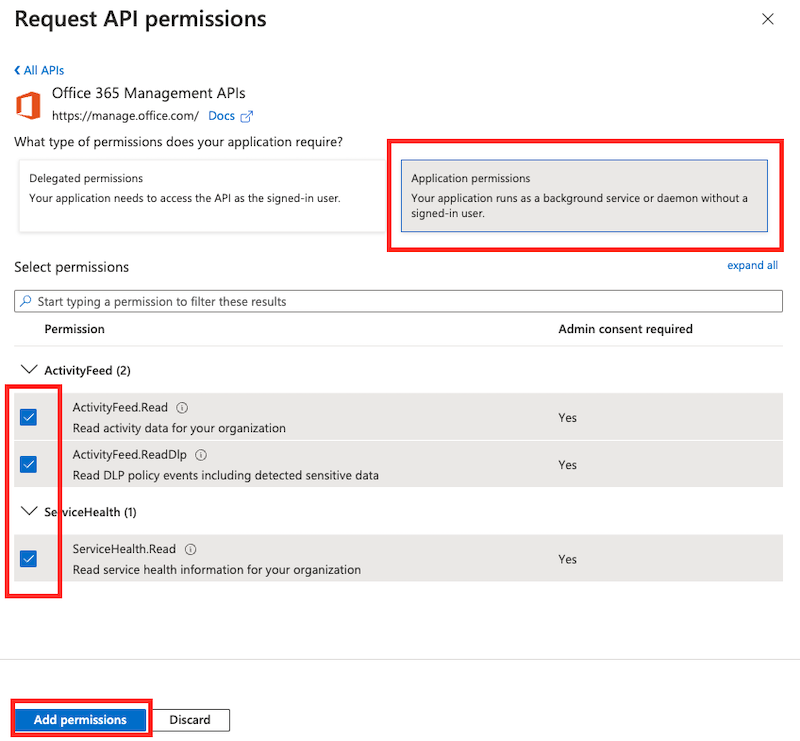
The application will be working with authentication keys so choose the Application Permissions option.
Select the ActivityFeed.Read, ActivityFeed.ReadDLP and ServiceHealth.Read options and click on Add Permissions:
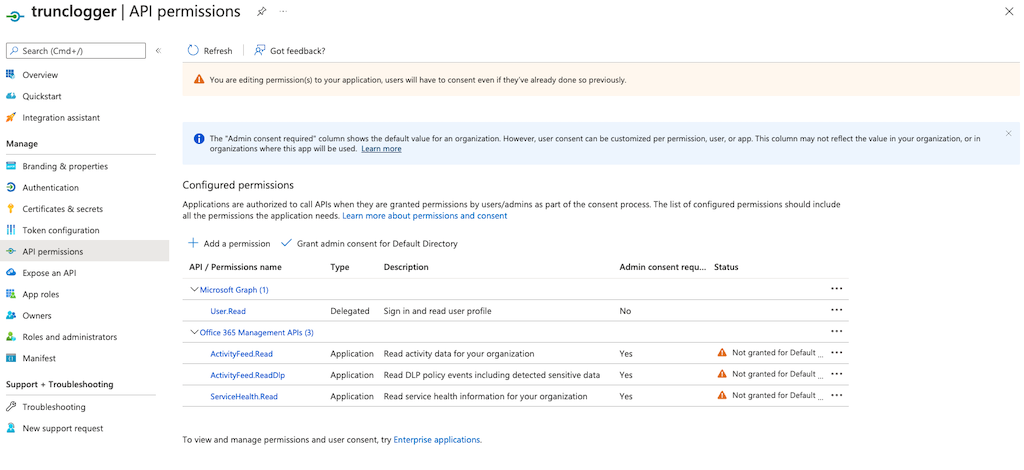
When you are done, it will look like this:
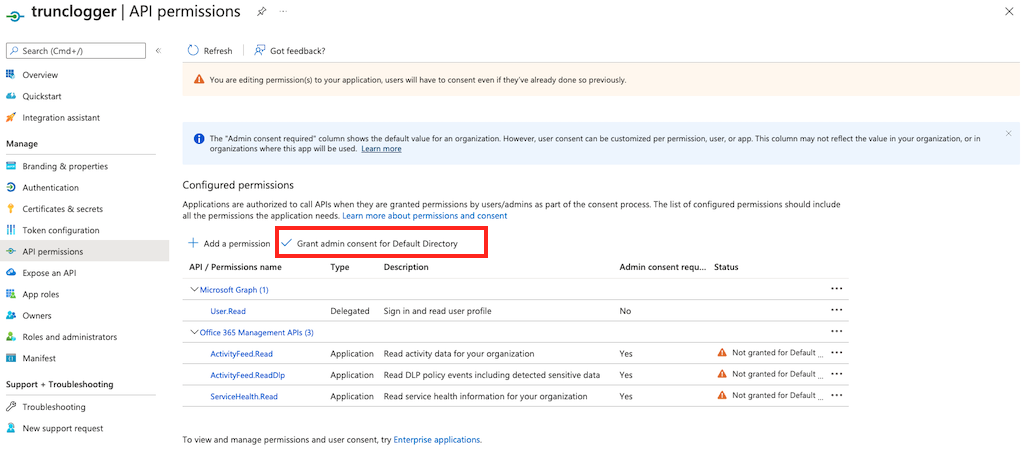
The final step is to grant admin consent for the default directory here:
Step 5. Enable Office 365 Logging into Trunc
The final step is configure Trunc to consume the logs. You can do this by navigating to our Microsoft Office 365 Event Integration panel in the Setup Page.
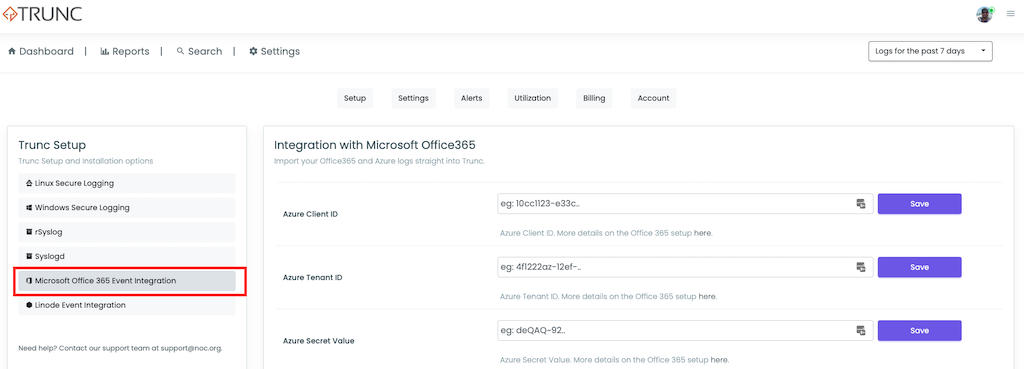
This is where you will set the tenantID, clientID, and Secret Value (not the key).
You will be able to choose what logs to pull (Exchange, Sharepoint, Azure Active Directory, DLP and Auditing) and they will start to be extracted within a few minutes.
Posted in trunc product_configuration by trunc_team